
Getting a loan approved with conditions means your lender intends to fund your mortgage once you satisfy a specific list of outstanding requirements. This is not a denial, and it is not a final green light. It sits squarely in the middle of the approval process, and what you do in the next 24-48 hours directly affects whether you close on time.
Your immediate actions:
- Read the full condition list before doing anything else
- Categorize each item as Prior-to-Approval (PTA), Prior-to-Doc (PTD), or Prior-to-Funding (PTF)
- Gather and upload requested documents to your lender’s secure portal the same day
- Call or message your loan officer to confirm receipt and flag any items you cannot produce immediately
Urgent warning: Do not open new credit accounts, make large deposits or withdrawals, or change jobs between now and funding. Any of those moves can trigger a re-review and potentially reverse your approval.
Pro Tip: Set a phone reminder for 24 hours after each upload. If your loan officer has not confirmed receipt, follow up. Files that go quiet get pushed to the back of the underwriting queue.
Table of Contents
- How conditional approval fits into the mortgage stages
- Common conditions you are likely to receive and what satisfies each
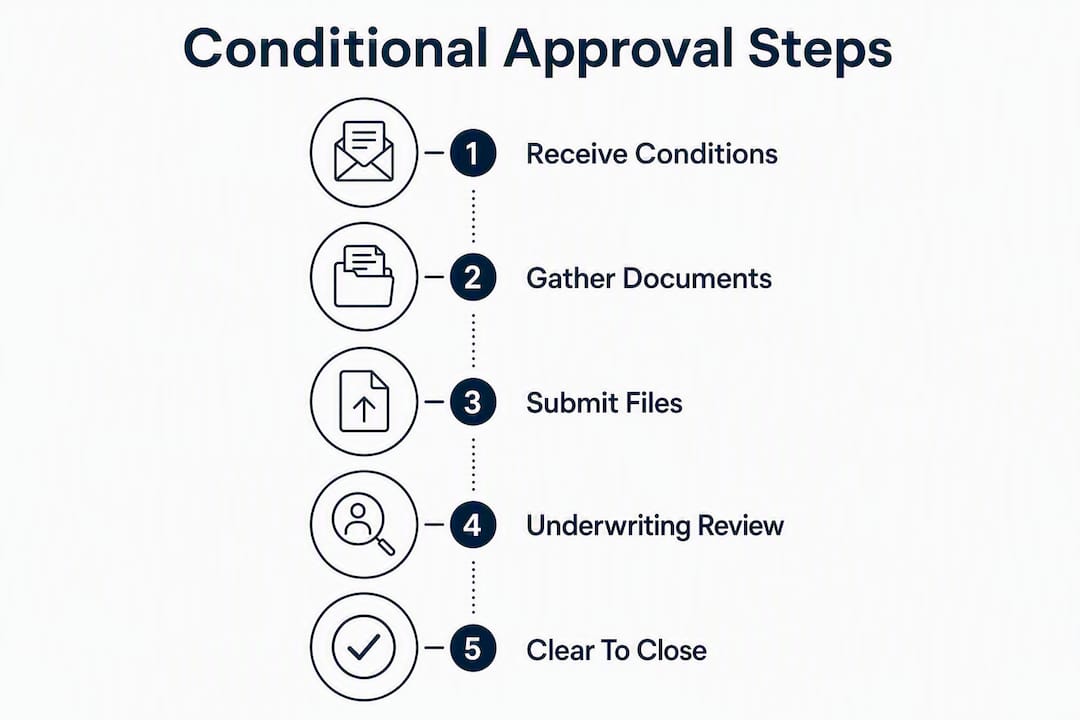
- How to clear your conditions: a step-by-step checklist
- What can still derail your mortgage after conditional approval
- How long does it take to go from conditional approval to clear-to-close?
- Special guidance for self-employed borrowers
- What happens after you receive clear-to-close
- Key Takeaways
- The part most borrowers get wrong
- Self-employed in Texas? Here is a faster path to qualification
- Useful sources and next steps
How conditional approval fits into the mortgage stages
A conditional loan approval is not a standalone event. It is one of four distinct stages in the mortgage process, and knowing where you stand tells you exactly how much runway you have left.
Prequalification is an informal estimate based on self-reported income and credit. No documents change hands, and no underwriter reviews the file. Preapproval goes further: the lender pulls your credit, reviews basic income documentation, and issues a letter stating a likely loan amount. Neither stage involves a full underwriting review.
Conditional approval is where the underwriter enters the picture. They have reviewed your complete file and determined the loan is approvable, but specific items need resolution before final sign-off. Clear to close (final approval) comes when every condition is satisfied and the lender is ready to prepare closing documents.
The table below shows how conditions are categorized by urgency, which is the single most important thing to understand about the approval-with-conditions stage.
| Condition Tier | Full Name | When It Must Be Cleared | What Happens If It Is Not |
|---|---|---|---|
| PTA | Prior-to-Approval | Before any approval is issued | Loan cannot move forward at all |
| PTD | Prior-to-Doc | Before closing documents are prepared | Closing Disclosure cannot be issued; closing is delayed |
| PTF | Prior-to-Funding | Before the lender wires funds | Loan is signed but funds are not released |
Underwriting conditions are organized into these three tiers precisely because not every item carries the same urgency. PTA items are blockers. PTD items trigger the three-business-day Closing Disclosure clock the moment they clear. PTF items are often handled at or just after the signing table. Knowing which tier each condition falls into lets you sequence your work correctly instead of spending energy on a PTF item while a PTA item sits unresolved.
Common conditions you are likely to receive and what satisfies each
Conditional approval arrives sometime during underwriting and can contain multiple items. Most fall into a handful of predictable categories.

Income and employment verification The underwriter needs to confirm your income is stable and ongoing. Typical documents: two most recent pay stubs, W-2s for the past two years, and a Verification of Employment (VOE) form completed by your employer. For salaried borrowers, this is usually straightforward.
Asset and down payment documentation Lenders want to see that your closing funds are yours and have been in your account long enough to be considered “seasoned.” Typical documents: two to three months of bank statements, investment account statements, and a signed gift letter with proof of transfer if any portion of the down payment is a gift. Gift funds require a letter that names the donor, states the relationship, specifies the dollar amount, confirms no repayment is required, and includes a bank statement or wire confirmation showing the transfer.
Appraisal conditions If the appraisal comes in at or above the purchase price, this condition is routine. If it comes in below, lenders will not fund above appraised value, which forces a negotiation. Options include paying the gap in cash, renegotiating the purchase price with the seller, requesting an appraisal review, or walking away if your contract includes an appraisal contingency.
Title and insurance The title company must confirm clear ownership with no unresolved liens or encumbrances. Typical documents: title commitment, title affidavit, and a homeowners insurance binder showing the lender as mortgagee.
HOA and condo documentation For condo purchases, the lender often requires HOA financial statements, the master insurance policy, and a condo questionnaire completed by the association.
Credit and debt explanations Unusual credit inquiries, late payments, or collections trigger a Letter of Explanation (LOE). The underwriter is not looking for a story; they want a one-paragraph factual statement with dates and amounts.
| Condition Category | Typical Documents Required |
|---|---|
| Income/Employment | Pay stubs (2 most recent), W-2s (2 years), VOE form |
| Assets/Down Payment | Bank statements (2-3 months), gift letter + transfer proof |
| Appraisal | Appraisal report, repair receipts (if required), gap resolution |
| Title | Title commitment, title affidavit, lien release if applicable |
| Homeowners Insurance | Insurance binder with lender listed as mortgagee |
| HOA/Condo | HOA questionnaire, master insurance policy, financials |
| Credit Explanation | Letter of Explanation with dates, amounts, and resolution |
| Tax Returns | Federal returns (2 years), IRS transcripts (4506-C) |
How to clear your conditions: a step-by-step checklist
The order you tackle conditions matters as much as the speed. Work through PTA items first, then PTD, then PTF. A PTF item left sitting does not delay your closing date; a PTA item left sitting does.
- Print or export the full condition list from your lender’s portal and mark each item with its tier (PTA, PTD, PTF).
- Gather PTA documents first. For income conditions, pull your two most recent pay stubs and your last two W-2s. For asset conditions, download bank statements directly from your bank’s portal as PDFs, not screenshots.
- Write any required Letters of Explanation. Keep each LOE to one or two paragraphs. State the date, the dollar amount, and the specific event. Underwriters treat LOEs as factual clarifications, not personal narratives. “On March 14, 2024, I received a $4,500 transfer from my mother as a gift toward my down payment. No repayment is required.” That is the entire letter.
- Compile PTD documents once PTA items are submitted. These include your insurance binder, title documents, and any appraisal-related items.
- Upload everything to the lender’s secure portal, tagging each file to its specific condition entry. Name files clearly: “Smith_BankStatement_Jan2025.pdf” beats “scan001.pdf” every time.
- Confirm uploads with your loan officer within the hour. Do not assume the portal notification is enough.
- Follow up within 24 hours if you have not received confirmation that the underwriter reviewed the submission. Buyers who respond within 24 hours close on time; slow responses can push a 30-day timeline to 45 days.
What to do when a document does not exist: If you cannot produce a requested historical document, do not leave the condition blank. Submit a concise LOE explaining why the document is unavailable and attach any supporting evidence you do have. Underwriters accept well-written LOEs in place of unavailable documents far more often than borrowers expect.
LOE best practices:
- One to two paragraphs maximum
- Lead with the date and dollar amount of the event in question
- State facts only; no emotional context, no lengthy backstory
- End with a one-sentence resolution (“The account was paid in full on June 3, 2024”)
- Sign and date the letter
For a broader look at the mortgage underwriting workflow, including how conditions fit into the full approval roadmap, a third-party explainer can help you see the complete picture.
Pro Tip: Scan documents at 300 DPI minimum and save as PDF. Blurry or low-resolution files get kicked back, which costs you a full review cycle. Redact Social Security numbers on any document that does not require them.

What can still derail your mortgage after conditional approval
Conditional approval is not a guarantee. Several events between now and closing can reverse it, and most are avoidable.
- New credit inquiries or accounts: Opening a credit card, financing a car, or even a hard pull from a new lender can lower your credit score and change your debt-to-income ratio. Both are re-reviewed before funding.
- Reduced or changed income: A job change, a switch from salaried to commission, or a gap in employment triggers a new Verification of Employment. If the new income does not support the loan, the file goes back to underwriting.
- Large unexplained deposits: Any deposit that is not a regular paycheck needs a paper trail. A $5,000 transfer from a family member without a gift letter looks like undisclosed debt to an underwriter.
- Appraisal shortfall: If the property appraises below the purchase price, the lender will not fund the gap. Your options are to pay the difference in cash, renegotiate with the seller, request a formal appraisal review, or exit the contract if you have an appraisal contingency.
- Title issues: An unresolved lien, an ownership dispute, or an error in the chain of title can halt closing entirely until the title company resolves it.
- Failed final Verification of Employment: Lenders run a final VOE shortly before funding. If your employer confirms you are no longer employed, the loan stops.
If any of these events occur, contact your loan officer immediately. Do not wait for the underwriter to discover it. Proactive disclosure with an LOE gives you a chance to resolve the issue; silence almost never helps.
If the loan is ultimately denied after conditional approval, review your purchase contract for contingency language. Most contracts include a financing contingency that protects your earnest money if the loan falls through for documented reasons.
How long does it take to go from conditional approval to clear-to-close?
The short answer: 24-72 hours per individual condition when you respond promptly, and 5-10 business days total from conditional approval to clear-to-close under normal circumstances. The full loan process from application to closing typically runs 30-45 days or more.
| Stage | Typical Timeframe | Key Variable |
|---|---|---|
| Conditional approval issued | During underwriting | File complexity |
| Borrower submits conditions | Same day to 48 hours | Borrower responsiveness |
| Underwriter reviews conditions | 24-72 hours per item | Lender volume |
| Clear to close issued | Several business days after conditions submitted | Number and complexity of conditions |
| Closing Disclosure issued | Same day as clear-to-close | PTD items cleared |
| Mandatory CD review period | 3 business days (federal requirement) | Non-negotiable |
| Closing day | After 3-day CD period | Scheduling |
The three-business-day Closing Disclosure review period is a federal requirement under TRID (TILA-RESPA Integrated Disclosure rules). It cannot be waived or shortened. PTD conditions must clear before the CD can be issued, so any delay on a PTD item directly pushes your closing date.
Factors that slow the timeline:
- High lender volume (common in spring and summer buying seasons)
- Third-party delays: employers slow to return VOE forms, appraisers with backlogs, title companies resolving liens
- Complex files: self-employment income, multiple properties, gift funds from overseas
- Borrower delays in uploading documents
Factors that speed it up:
- Responding to every condition the same day it arrives
- Uploading complete, legible documents in a single submission rather than piecemeal
- Having your loan officer flag your file as time-sensitive if your rate lock is expiring
If your rate lock is within two weeks of expiring, tell your loan officer now. Extensions cost money, and some lenders will not grant them.
Special guidance for self-employed borrowers
Self-employed borrowers typically face more underwriting conditions than W-2 employees, primarily because income verification is more complex. Underwriters cannot simply call an employer; they need to reconstruct income from tax returns, profit-and-loss statements, and bank records.
For a traditional mortgage, underwriters usually request two years of federal tax returns, a year-to-date P&L statement, and sometimes a balance sheet. The challenge is that tax returns often show lower income after deductions, which can reduce the qualifying amount even when the business is genuinely profitable.
Bank-statement programs work differently. Instead of tax returns, the lender evaluates 12-24 months of bank deposits to calculate qualifying income. This approach reflects actual cash flow rather than taxable income, which is a meaningful distinction for business owners and 1099 contractors.
Typical documents for a self-employed file:
- 12-24 months of personal or business bank statements
- Year-to-date profit-and-loss statement (often CPA-prepared)
- Business license or CPA letter confirming self-employment
- 1099s or invoices if requested
- Signed 4506-C (IRS transcript request) if the lender requires it
One thing to understand: a bank-statement program reduces the income-verification burden, but it does not eliminate appraisal or title conditions. Those apply to every loan regardless of how income is documented. If the property appraises short or the title has an unresolved lien, the same resolution steps apply.
Self-employed borrowers in Texas can use the self-employed affordability calculator at Texasbankstatementloans to estimate qualifying income from bank deposits before the underwriter ever sees the file. Running that number early tells you whether the loan amount you need is realistic under a bank-statement program, which is a far better position than discovering a gap mid-underwriting.
Pro Tip: Prepare your 12-month bank statement package before you even apply. Underwriters flag unexplained large deposits in bank statements the same way they do in asset accounts. If you have any irregular deposits, write a brief LOE for each one and attach it to the statement package from the start.
For self-employed borrowers in Dallas and across Texas, having the full statement package ready at application can cut the condition list significantly.
What happens after you receive clear-to-close
Clear-to-close means the underwriter has signed off on every condition and the lender is preparing closing documents. The Closing Disclosure is issued the same day or the next business day, and the mandatory three-business-day review period begins immediately.
Use those three days to:
- Review the Closing Disclosure line by line. Compare it to your Loan Estimate. Fees should not have changed materially; if they have, ask your loan officer for an explanation before signing.
- Confirm wire instructions with your title company by phone, not just by email. Wire fraud targeting real estate closings is a documented and ongoing problem. Call the number on the title company’s official website to verify.
- Arrange certified funds or wire transfer. Most title companies require a cashier’s check or wire for closing funds. Personal checks are rarely accepted for amounts over a few hundred dollars.
- Confirm your homeowners insurance is active and that the lender is listed as the mortgagee on the binder.
- Schedule your final walkthrough of the property, typically within 24 hours of closing.
- Gather your closing-day documents: government-issued photo ID (two forms if your title company requires it), wire confirmation or cashier’s check, and a copy of your insurance binder.
PTF items are often handled at or just after the signing table. The most common PTF items are a final VOE (your employer is called the morning of closing), a final credit check, and confirmation that your wire has been received. The loan funds after the title company confirms all PTF items are satisfied and the deed is recorded.
Key Takeaways
Getting from conditional approval to clear-to-close comes down to one thing: respond to every condition the same day it arrives, upload complete documents, and make no financial changes until the lender wires funds.
| Point | Details |
|---|---|
| Prioritize PTA items first | PTA conditions block all progress; clear them before touching PTD or PTF items. |
| Respond within 24 hours | Same-day responses keep your file at the top of the underwriting queue and protect your closing date. |
| Write tight LOEs | State the date, dollar amount, and resolution in one to two paragraphs; underwriters want facts, not backstory. |
| Know the 3-day CD rule | The Closing Disclosure triggers a mandatory three-business-day review period that cannot be shortened. |
| Texasbankstatementloans for self-employed | Self-employed Texas borrowers can qualify using 12-24 months of bank deposits instead of tax returns, with a 60-second qualification check available. |
The part most borrowers get wrong
The conventional advice is “respond quickly and gather your documents.” That is correct, but it misses the behavioral piece that actually separates borrowers who close on time from those who do not.
Most delays are not caused by missing documents. They are caused by incomplete submissions. A borrower uploads three of four requested bank statement months, the underwriter flags the gap, the file goes back to the queue, and three days disappear. Or a borrower submits an LOE that reads like a personal essay, the underwriter asks for a revised version, and another review cycle starts.
Treat the condition list like a project checklist. Each item gets a status: not started, in progress, submitted, confirmed. When you upload a document, mark it submitted and set a 24-hour follow-up. When your loan officer confirms the underwriter accepted it, mark it confirmed. Do not move on until you have that confirmation.
The other thing borrowers consistently underestimate is how much the submission format matters. A single PDF per condition, named clearly, tagged to the right condition entry in the portal, reviewed at 300 DPI: that file gets processed in one pass. A ZIP folder of phone photos named “IMG_4492” through “IMG_4501” gets kicked back or manually sorted, which adds time. For a practical walkthrough of how to submit mortgage paperwork through a lender portal, a step-by-step guide can save you a full review cycle.
Underwriting turnaround after a complete, clean submission is typically 24-72 hours. After an incomplete or disorganized submission, it can be a week. The difference is entirely within your control.
Self-employed in Texas? Here is a faster path to qualification
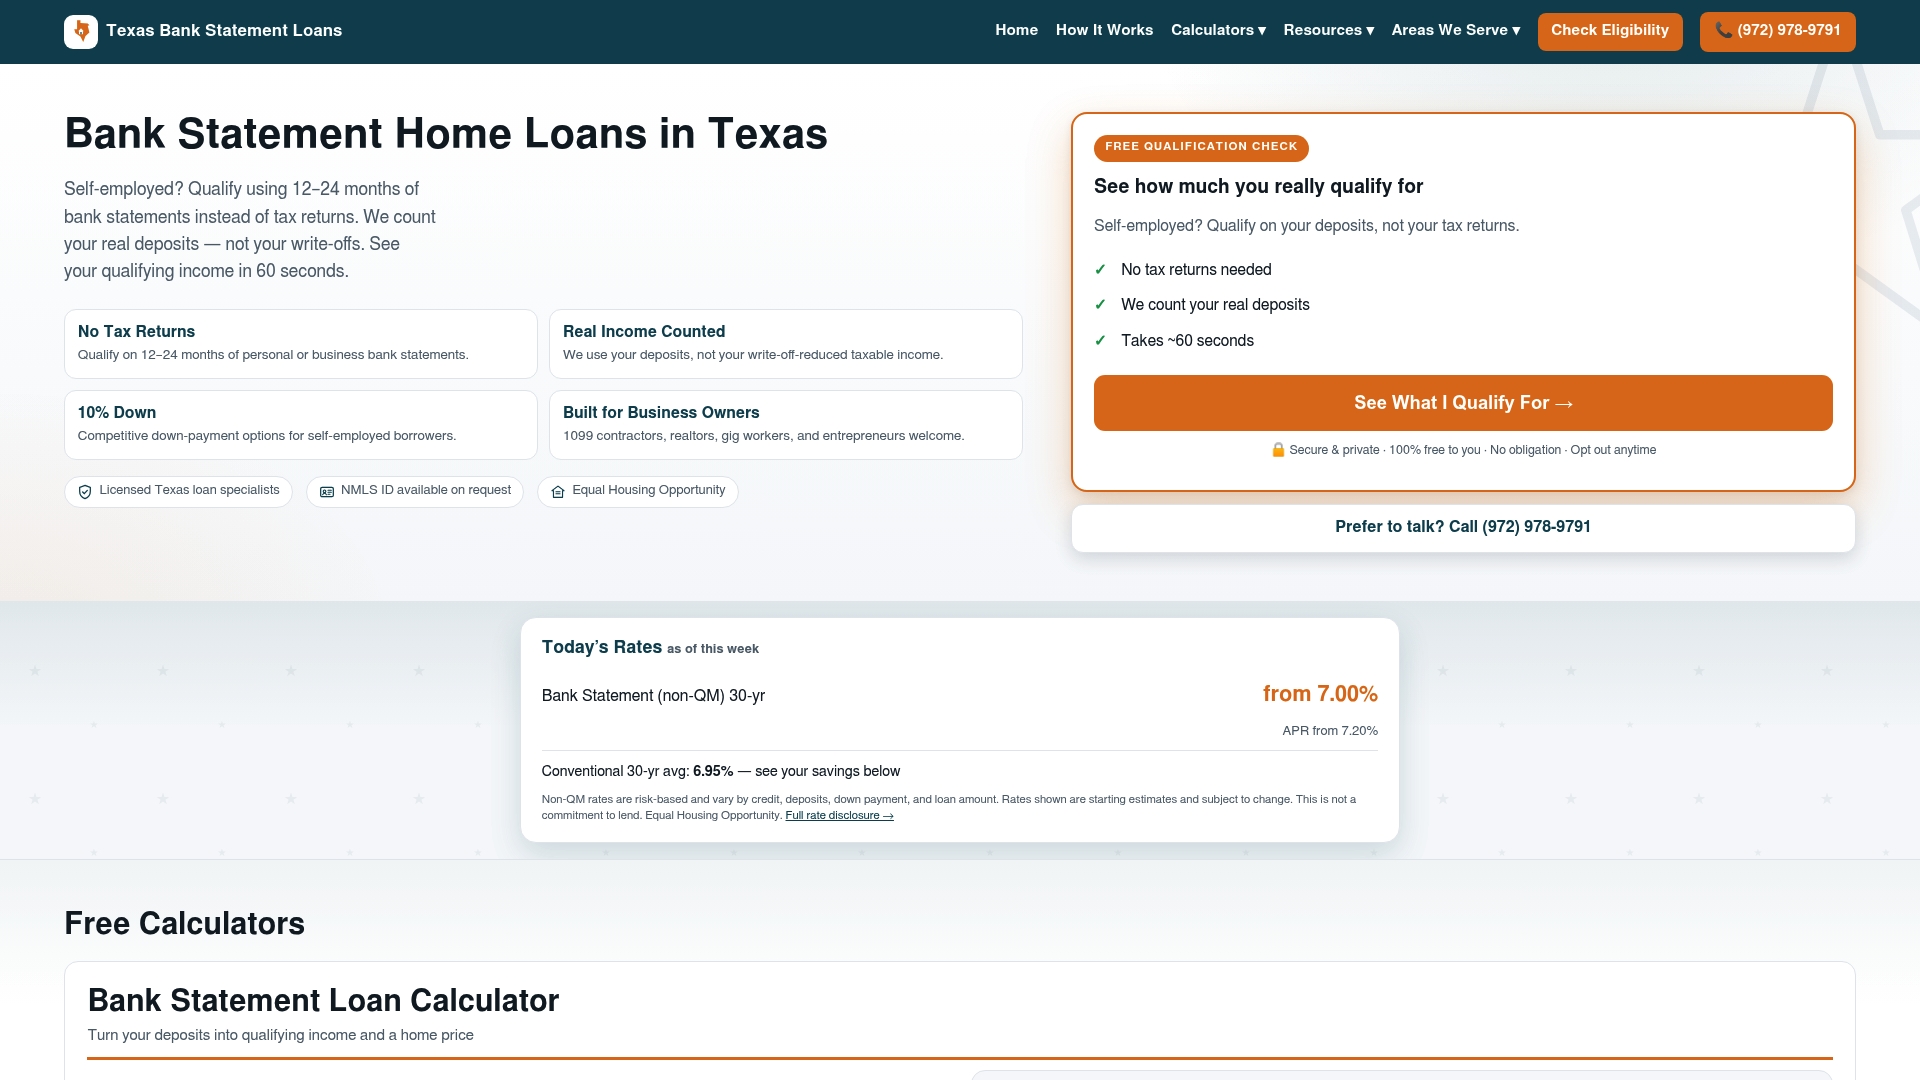
If you are self-employed, a 1099 contractor, or a business owner in Texas, the standard mortgage process often works against you. Tax deductions that reduce your tax bill also reduce your qualifying income on paper, which can make a profitable business look like a borderline borrower to a conventional underwriter.
Texasbankstatementloans evaluates 12-24 months of bank deposits instead of tax returns, so your actual cash flow drives the qualification rather than your adjusted gross income. Down payment options start at 10%, and a no-obligation qualification check takes about 60 seconds to complete.
Whether you are buying in Houston, Plano, Midland, or anywhere else across Texas, the program is built for borrowers whose income does not fit neatly on a W-2. Check your qualification now or explore loan options in Houston to see what you could qualify for. Terms vary by county and borrower profile.
This article is general information, not financial or legal advice. Confirm current loan requirements with your lender or a qualified mortgage professional for your specific situation.
Useful sources and next steps
For borrowers who want to verify information directly from primary sources or read further:
- Bankrate: Conditional Approval Explained, Clear consumer-facing overview of what conditional approval means and what lenders typically require.
- Rocket Mortgage: Conditional Approval Guide, Detailed breakdown of common conditions including gift letter requirements.
- The Lenders Network: Conditions Before Closing, Explains the PTA/PTD/PTF tier system and what each means for your timeline.
- LegalClarity: Mortgage Underwriting Conditions, Practical guidance on writing LOEs and clearing stipulations.
- NMLS Consumer Access, Verify that your lender and loan officer are licensed in Texas before you submit any documents.
- Texasbankstatementloans: How It Works, Explains the bank-statement qualification process for self-employed borrowers in Texas.
- Mortgage calculators and tools, Free tools to estimate affordability and monthly payments using bank-statement income.
For file-specific questions, your loan officer is the right first call. Condition lists vary by lender, loan type, and borrower profile, and no general guide can substitute for a direct conversation about your specific file.
Recommended
See what you qualify for in 60 seconds, free and no credit check. Use the eligibility check at the top of this page.